Follow This Expert Guide To Learn How To Install Serum Presets Like A Pro.
What are Serum Presets?
Serum presets are pre-made sound settings that can be loaded into the popular virtual synthesizer plugin, Serum. These presets allow producers to quickly access unique sounds and effects without having to create them from scratch.
Step 1: Download the Presets
Start by downloading the Serum presets. Make sure the presets are compatible with your version of Serum to avoid any compatibility issues.
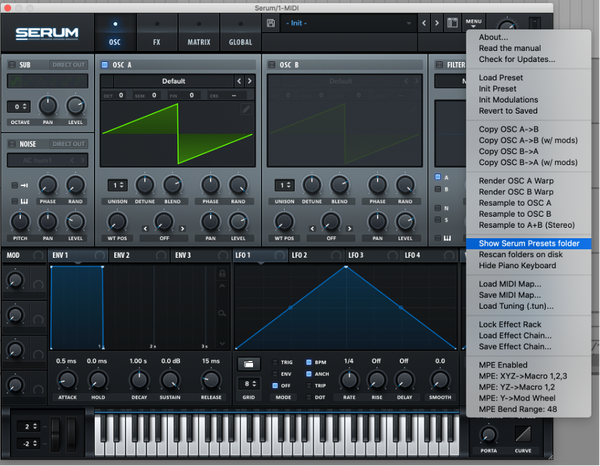
Step 2: Locate the Serum Presets Folder
Open Serum and go to the Menu bar. Click on "Show Serum Presets Folder" to open the folder where the presets should be placed.
Step 3: Copy the Presets
Copy the downloaded presets into the Serum Presets > User folder. Make sure to organize the presets into subfolders if needed for easier navigation within Serum.

Step 4: Refresh Serum
Close and reopen Serum to refresh the plugin. Go to the Menu bar and select "Rescan Folders on Disc" to load in the new presets. The presets should now be available for use in your music production projects.

Step 5: Explore and Create
Take some time to explore the new presets and experiment with different sounds and effects.
By following these steps, you can easily install serum presets and unlock a world of new sonic possibilities in your music production journey. Start creating and let your creativity flow!